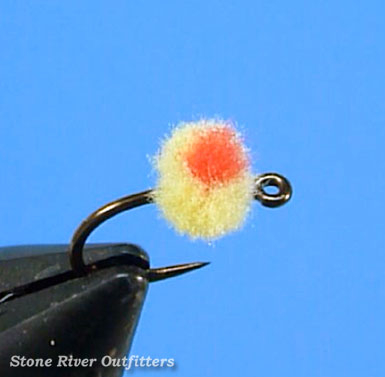
The McFlyFoam Egg
A refreshingly fast, fun, and extraordinarily easy fly to tie yourself, the delectable McFlyfoam Egg (a.k.a. the Glo Bug or Roe Bug) has proven equally irresistible to both trout and steelhead alike. An especially wise choice for anglers targeting trout and steelhead in rivers where springtime suckers and fall-run salmon can be found spawning in heavy abundance, this simple yet deadly little egg imitation is definitely one you will want to try tying and fishing this season ahead.
Recipe / Materials List
- Hook: Mustad Signature C67S Size 10 (or similar)
- Thread: Danville's 140-denier Flymaster Plus
- Egg Body: McFlyFoam Yarn (2 - 3 strands, primary color)
- Yolk Dot: McFlyFoam Yarn (1/4 - 1/2 strand, contrasting color)

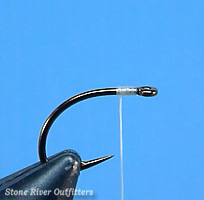 Step 1: We will begin by first installing our tying thread securely to the shank using a tight wound jam knot placed just behind the hook eye. Once snug, we will trim away our thread's excess free-running tag end neatly at the jam knot's base, like shown.
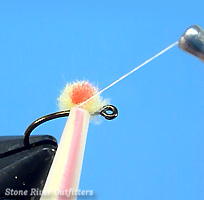
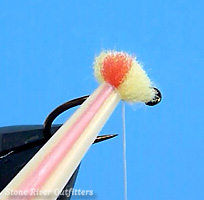 Step 2: Next, using our pre-loaded Glo Bug Gun Dispenser, we will lay our McFlyfoam bundle carefully across the hook shank's top, with the yolk dot stripe purposely facing up like shown.
***Special Notes: Don't have a Glo Bug Gun of your own? Learn how to quickly and cheaply fabricate one by watching our detailed YouTube Tying Tutorial via the link posted above!
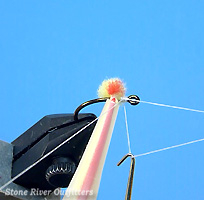
 Step 3: With the Glo Bug Gun held steadily in our offhand - and the protruding McFlyfoam fibers laid neatly across the hook shank's top long axis - we will next begin lashing the Egg firmly in place using the X-wrap method.
To do this, we'll start by first taking two or three nice taut-wound turns with our bobbin rearward like shown, guiding our thread up over-top-of, and then tautly around the McFlyfoam's compressed base and hook shank both.
***Special Notes: To ensure your egg comes out well-shaped and neatly-dressed, try to make sure each of your 2 or 3 successively tighter-wound thread wraps gets made directly one over top the other!
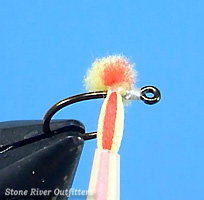
 Step 4: To complete our X-wrap lashing, we will now make another two or three more nice tight turns with our bobbin, this time guiding our thread forwards towards the hook eye like pictured, and ensuring again that our wraps wind over-top-of then tautly around, both the McFlyfoam's compressed base and hook shank.
***Special Notes: As hinted in the previous step, try to ensure each of these 2 or 3 successively tighter-wound forward-oriented thread wraps also gets made directly atop one another too!
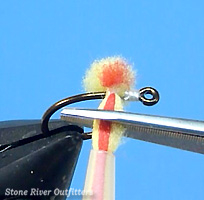
 Step 5: With the McFlyfoam yarn now firmly lashed, we will next take moment to build a quick and tidy thread head made just in front of the cinched egg yarn bundle. With the thread head built, we will then install just behind the hook eye, a pair of tight wound whip finish knots.
***Special Notes: A single whip knot followed by a quick dab of head cement will indeed suffice too, but since I don't like wasting time fumbling for my cement bottle and bodkin when cranking out eggs, I personally find a well-placed double-whip finish works just fine!
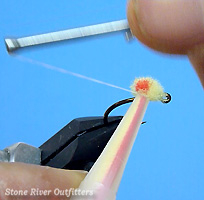
 Step 6: Once snugly whipped, and with our excess tying thread trimmed neatly away, we will next pinch and pull our Glo Bug Gun slowly and smoothly away from the hook shank, exposing from the dispenser tube's tip, a taut-stretched length of McFlyfoam that measures, like shown, approximately twice that of the egg's far-side bunch.
 Step 7: Then, with the Glo Bug Gun held steadily in our offhand and the McFlyfoam still tautly drawn, we will next snip our McFlyfoam cleanly in half with quick and continuous cut of our scissors made pursposefully at the bundle's stretched center.
 Step 8: Once trimmed, we'll next take a moment to fluff our egg round, using a gentle pinch and preen motion with our finger tips.
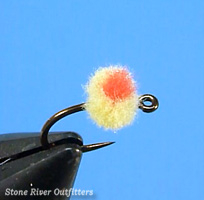
Naturally, once satisfied and happy with our Glo Bug's overall shape and appearance, quickly remove the finshed fly from your vise jaws, place neatly inside your fly box, then repeat!
Summary / Closing Remarks: Well friends, there we have it! The McFlyfoam Egg tied start-to-finish using the fast, fun, and easy dispenser-gun method! If springtime trout and or fall-run steelhead are on your angling horizon this season ahead, be sure to give tying and fishing this delectable little glo/roe bug imitation a try! As always, have fun with this one gang. Thanks so much for all your support! And please don't hesitate to call on us if we can be of further help. Sincerely - Nate Harris